
1. It turns on the headlights without a relay.
2. It turns on the front parking lights and the rear taillights as two separate circuits.
3. It turns on the dash lights and dims them.
4. It turns on the map and dome lights.
5. It has a connector junction that provides 12V to the stop light circuit.
I have three wiring diagrams in front of me, and each one is a bit different. So I decided it was time to dive in and learn how to remove it and test it. There are a lot of images here so bear with me.
First, disconnect your battery.
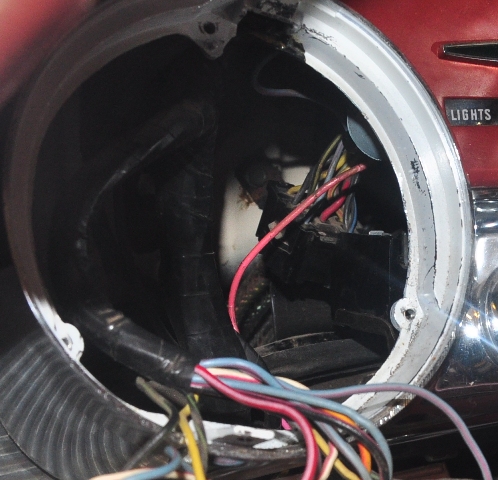
It looked to me that the left gauge bezel would be the easiest way to get to it. So I carefully removed the gauge and set it aside. There are two clips that hold the connector onto the switch. Unclip those and pull the connector off.
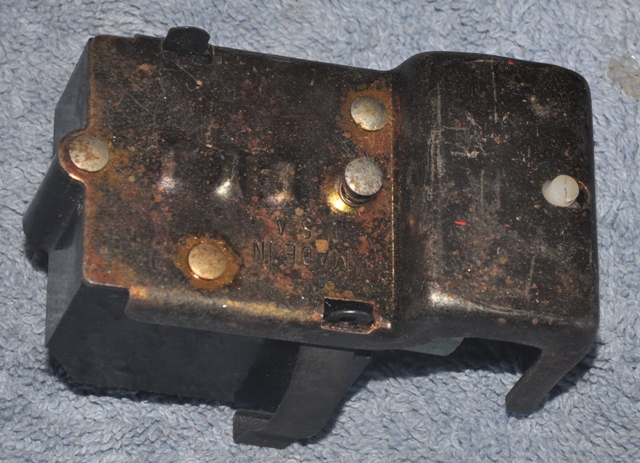
To remove the switch shaft, there is a button on the bottom center of the switch. With the switch in the on position, gently pull on the shaft and press the button. I found that there was a "sweet spot" just before the button is completely depressed that released the shaft.
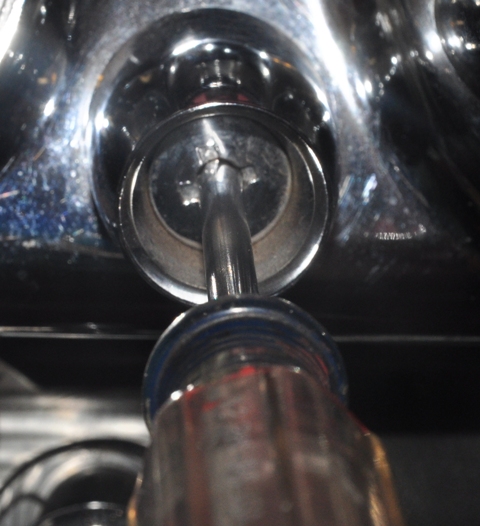
Then you will find this odd shape that was probably for a specialty tool. I inserted a phillilps screwdriver that was tight in the hole and it easily unscrewed. You can now remove the bezel and switch.
Here is the assembly. Reinstall just the shaft into the switch. It will click into place.

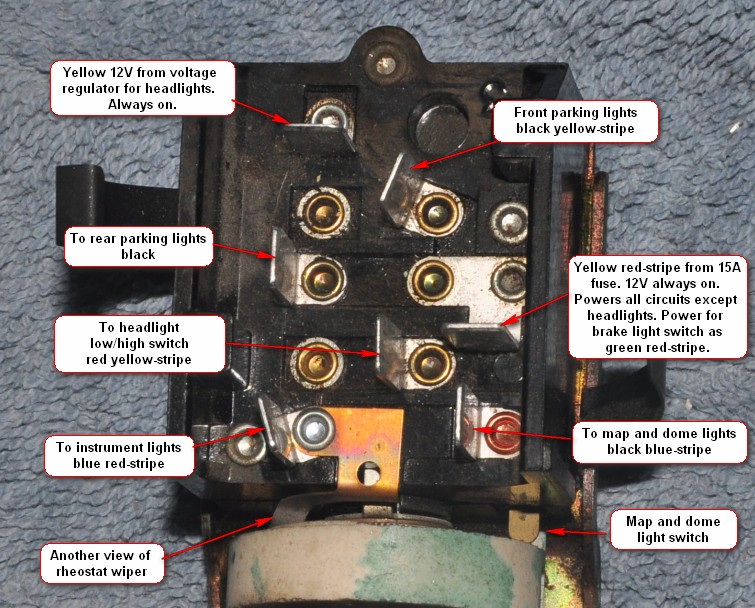
Now the wires need to be identified. Based on the wiring diagrams I have, this is how it is wired.
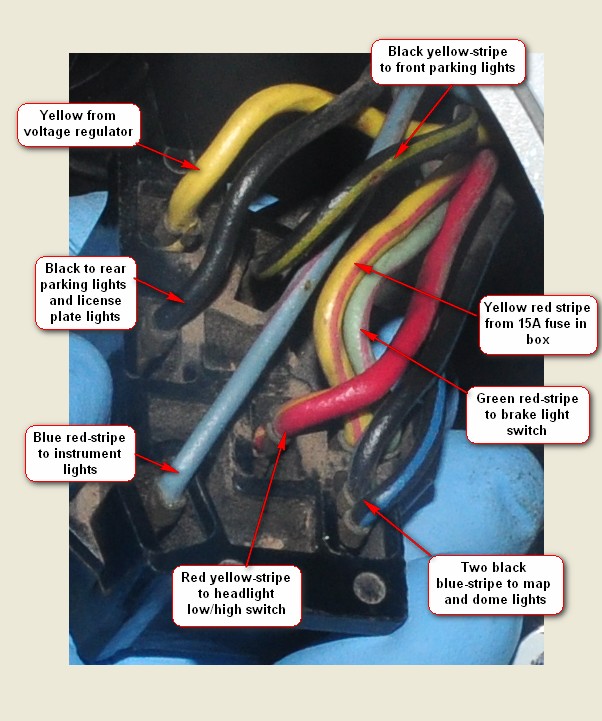
This is how it corresponds on the switch:
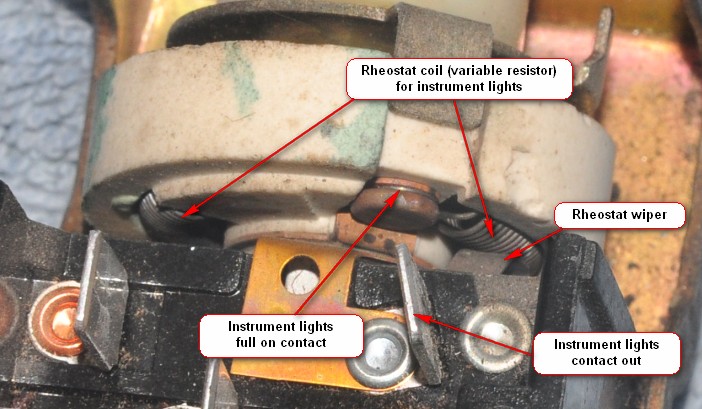
Here is a view of the rheostat:
Now that contacts are known, the switch can be tested. To summarize, there are two sources of 12V. The yellow wire for the headlights and the yellow red-stripe for everything else. As best I can tell, the headlight circuit is protected by a circuit breaker inside the switch as I could not find any other protection in the circuit diagram.
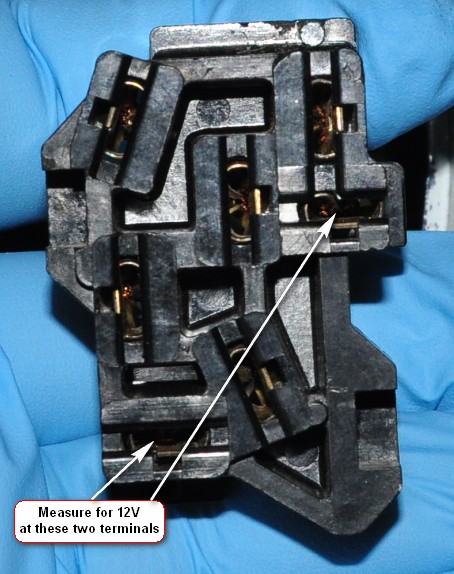
Now that the switch is out, reconnect the battery and measure for 12V at these two locations. The contact on the right comes from the 15A fuse in the fuse box. Make sure that fuse is good.
Disconnect the battery again.
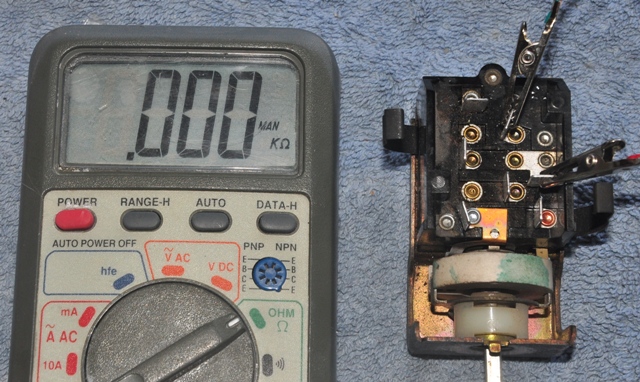
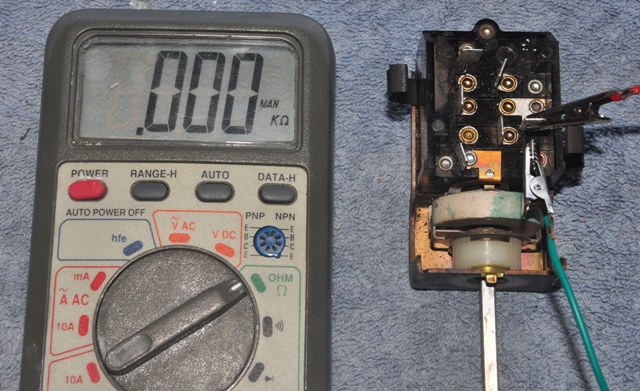
Testing the headlight switch. This is how my meter reads with an open circuit. The headlight switch is off. Note the contacts are yellow to red yellow-stripe
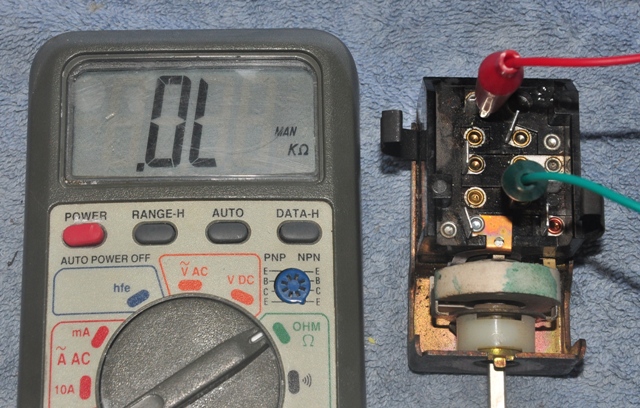
turn the switch to the full on position and there is full conductivity.
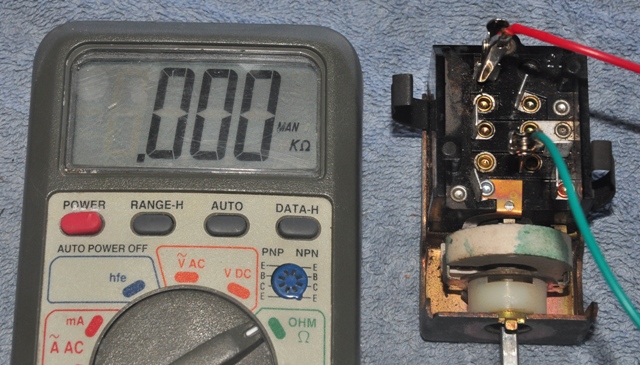
The next test is for the rear tail lights. Move the clip leads to the yellow red-stripe and black wire contacts. There should be full conductivity at both parking and headlight switch positions.
Now test the front parking lights. Leave your lead on the yellow red-stripe connector and move the other lead to black yellow-stripe. connector. It is the one at a slight angle.
At the parking switch position I found full conductivity:
However, with the switch full on there is no conductivity. Apparently the parking lights turn off when the headlights turn on. I would think the front parking lights should stay on. I was informed that this is by design.
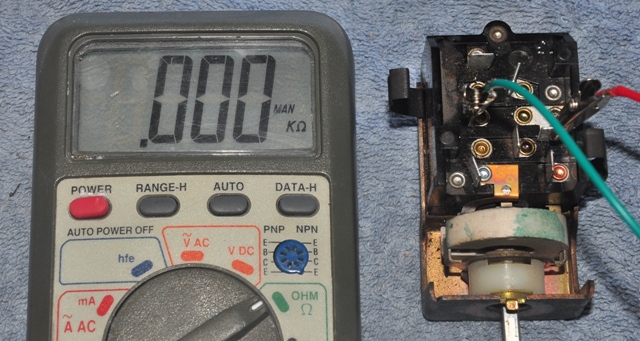
Next test the map and dome lights. Move your lead to the black blue-stripe connector and turn the switch completely counter-clockwise. The ceramic wheel has a notch in it that turns on the switch.
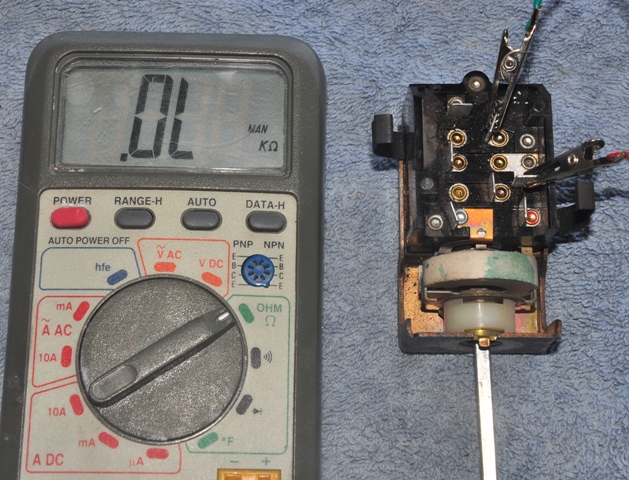
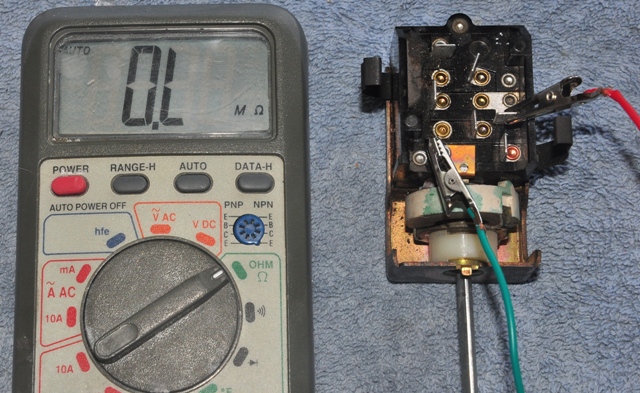
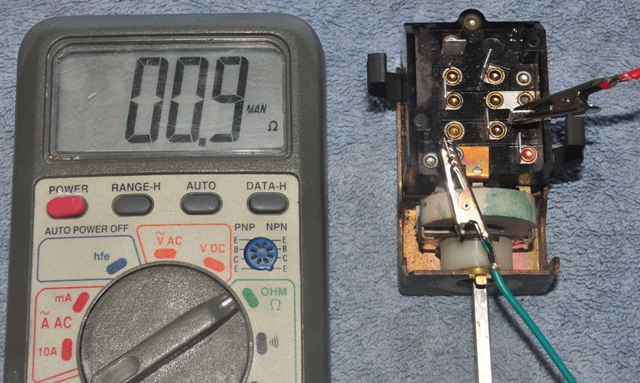
Next comes the rheostat test. Move your lead to the blue red-stripe connector that is attached to the wiper contact. With the switch fully clockwise and turned on to either parking light or headlight, there should be no conductivity:
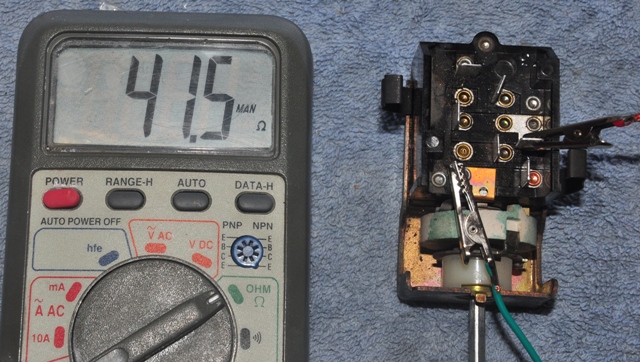
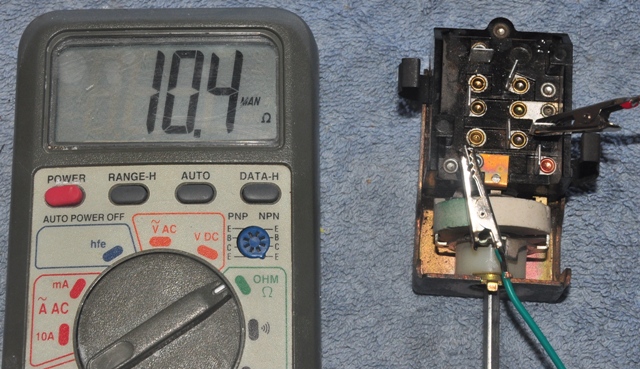
Slowly turn the rheostat counter-clockwise and eventually you will get a reading in ohms. Continue turning counter-clockwise and you will see the resistance drop until it reaches 0 ohms: You may also find dead spots, depending on the condition of the rheostat coil. Check the coil carefully for breaks or corrosion. If it fails this test, replace the switch.
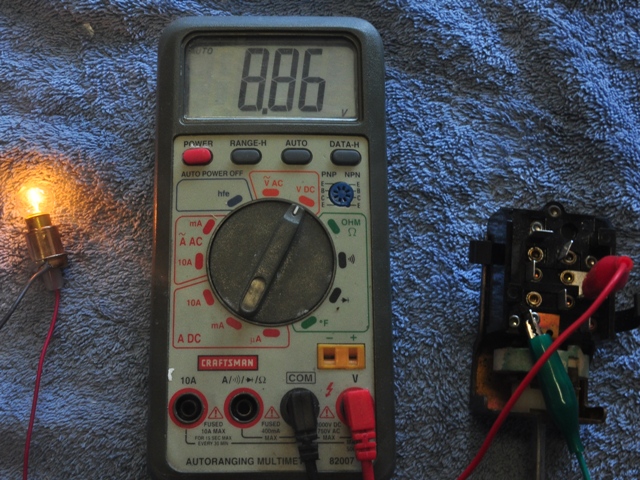
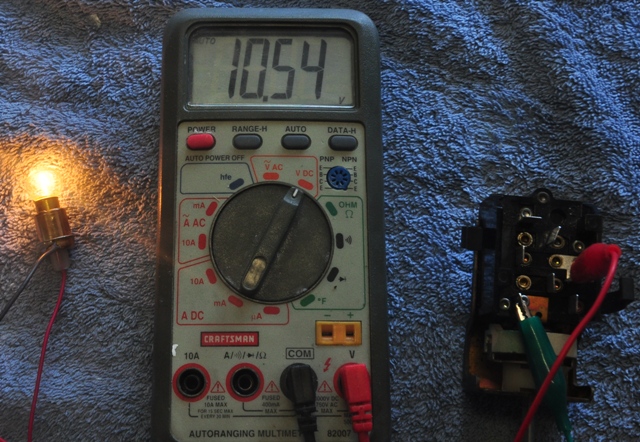
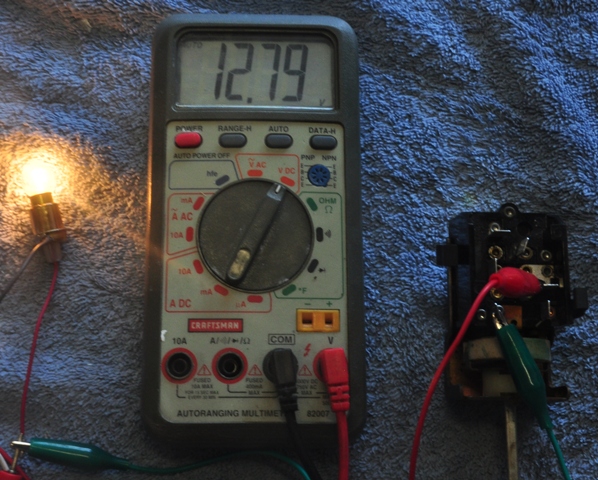
Here I have done a light bulb test by tying a power supply, #57 bulb, and voltmeter into the circuit. This will also help identify dead spots in the rheostat. Mine doesn't come on until nearly 9V so my coil may be a bit dead at the lower end.
Hope this is helpful.
Stay tuned. I will write up a summary of how to diagnose the headlight circuit.
